Culinary Christmas Series – Review 2 of 4

This is the second installment of my four-part series, reviewing the recipes I tried for the first time this holiday season.  In Review 1, I covered Christmas Spice Cookies, Whiskey Caramel Sauce and Candied “Limoncello” Peel.  Now, let’s take a look at Cinnamon Rolls with Cream Cheese Icing, Breakfast “Cupcakes” and Blueberry Lemon Bundt Cake.

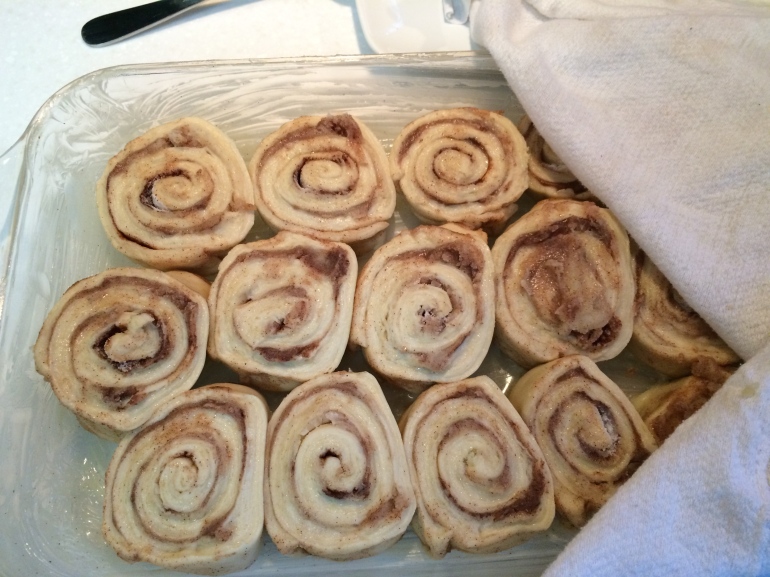
Cinnamon Rolls with Cream Cheese Icing (adapted from Pioneer Woman)

Cinnamon Rolls

Listen, I don’t want to pat myself on the back or anything, but these things were freaking amazing.  Neither my husband nor I could stop eating them. We had a slap fight over the last of them. That said, these suckers are not quick, easy or low in calories.  So, this is definitely a special-occasion recipe.  But, holy cannoli, so worth it.

I did not alter anything about the recipe for the rolls themselves.  In fact, I followed the recipe to the letter, because this was one of my first attempts at working with yeast that didn’t involve an actual bread maker.  The only deviation was the milk – I didn’t have a full quart of milk, so I used heavy cream and about 1/2 cup of buttermilk.  Given the results, I would do it again.

And where the Pioneer Woman says not to be shy about the butter or the sugar, I was most definitely not.  I do not know how much sugar and cinnamon I ended up using, but I did use four full sticks of butter.  (Now, stop it.  I made 32 cinnamon rolls, and some of that was used to grease the baking dishes …)

Can I say also that any recipe calling for “punching” anything as part of the prep is a winner in my book.  I left the dough in the fridge overnight.  In the morning, it had risen considerable.  I did, in fact, punch it.  Cathartic.  Especially at 6:00 a.m. on a vacation day.

A few notes on slicing and baking off:

  • When I sliced my rolls, I got 18 rolls from the first log of dough and 16 rolls from the second.  The recipe states that each log should yield 20 – 25 rolls.  I think you’d either have to roll the dough too thin or cut the rolls too thin to get that yield.  I rolled the dough to about 1/4″ thick, and I cut the rolls about 3/4″ thick.
  • For the baking, the recipe recommends placing the rolls in pie pans, but I didn’t have enough handy, so I put the rolls into 9 x 13 baking dishes.  I tried not to pack the rolls in too tightly, but they were touching.  The effect was to increase the cooking time from 18 minutes to about 25 minutes. I took them out when all the rolls had a nice golden brown top and the butter on the sides of the pan was bubbly.  The centermost rolls were slightly doughier than the outer rolls, but they were not undercooked.  The different was due I think more to the butter on the sides of the baking dish touching the outer rolls, giving them a crustier outer texture.

The thing I really altered from the recipe was the icing.  Maple is not one of my all-time favorite flavors (except on pancakes), and it’s hard for my taste buds to imagine anything other than cream-cheese-laden icing oozing off a warm ball of doughy, buttery, sugary cinnamon.  For the cream cheese icing, I whipped about 1/2 cup of cream cheese until smooth, added 1/2 cup of milk and 2 teaspoons of vanilla and whipped until blended, then I added powdered sugar in 1/4 cup increments until the icing was thick but still pourable – probably somewhere around 1 cup.  Ultimately, this was enough icing to cover both pans.  If you have more than you need, store it in an airtight container in the fridge.

We baked one pan of rolls that morning.  The second pan we put in the fridge, still covered with a kitchen towel, for two days.  Equally good after baking.

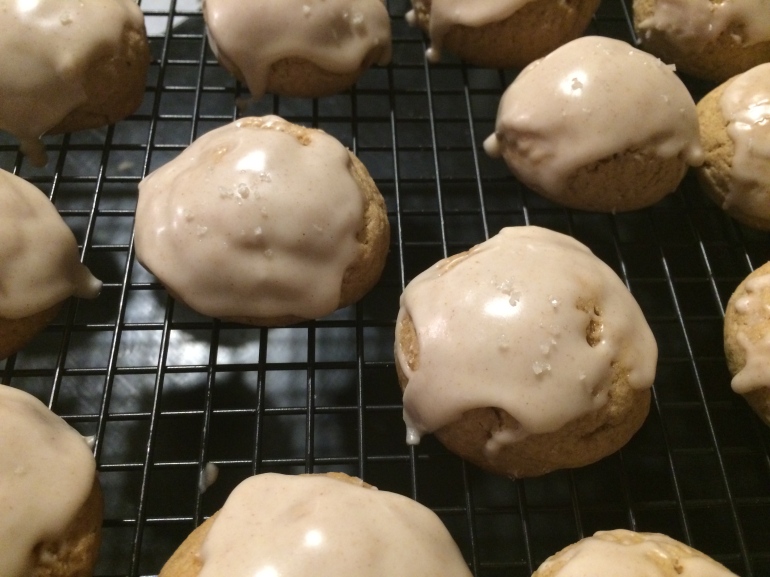
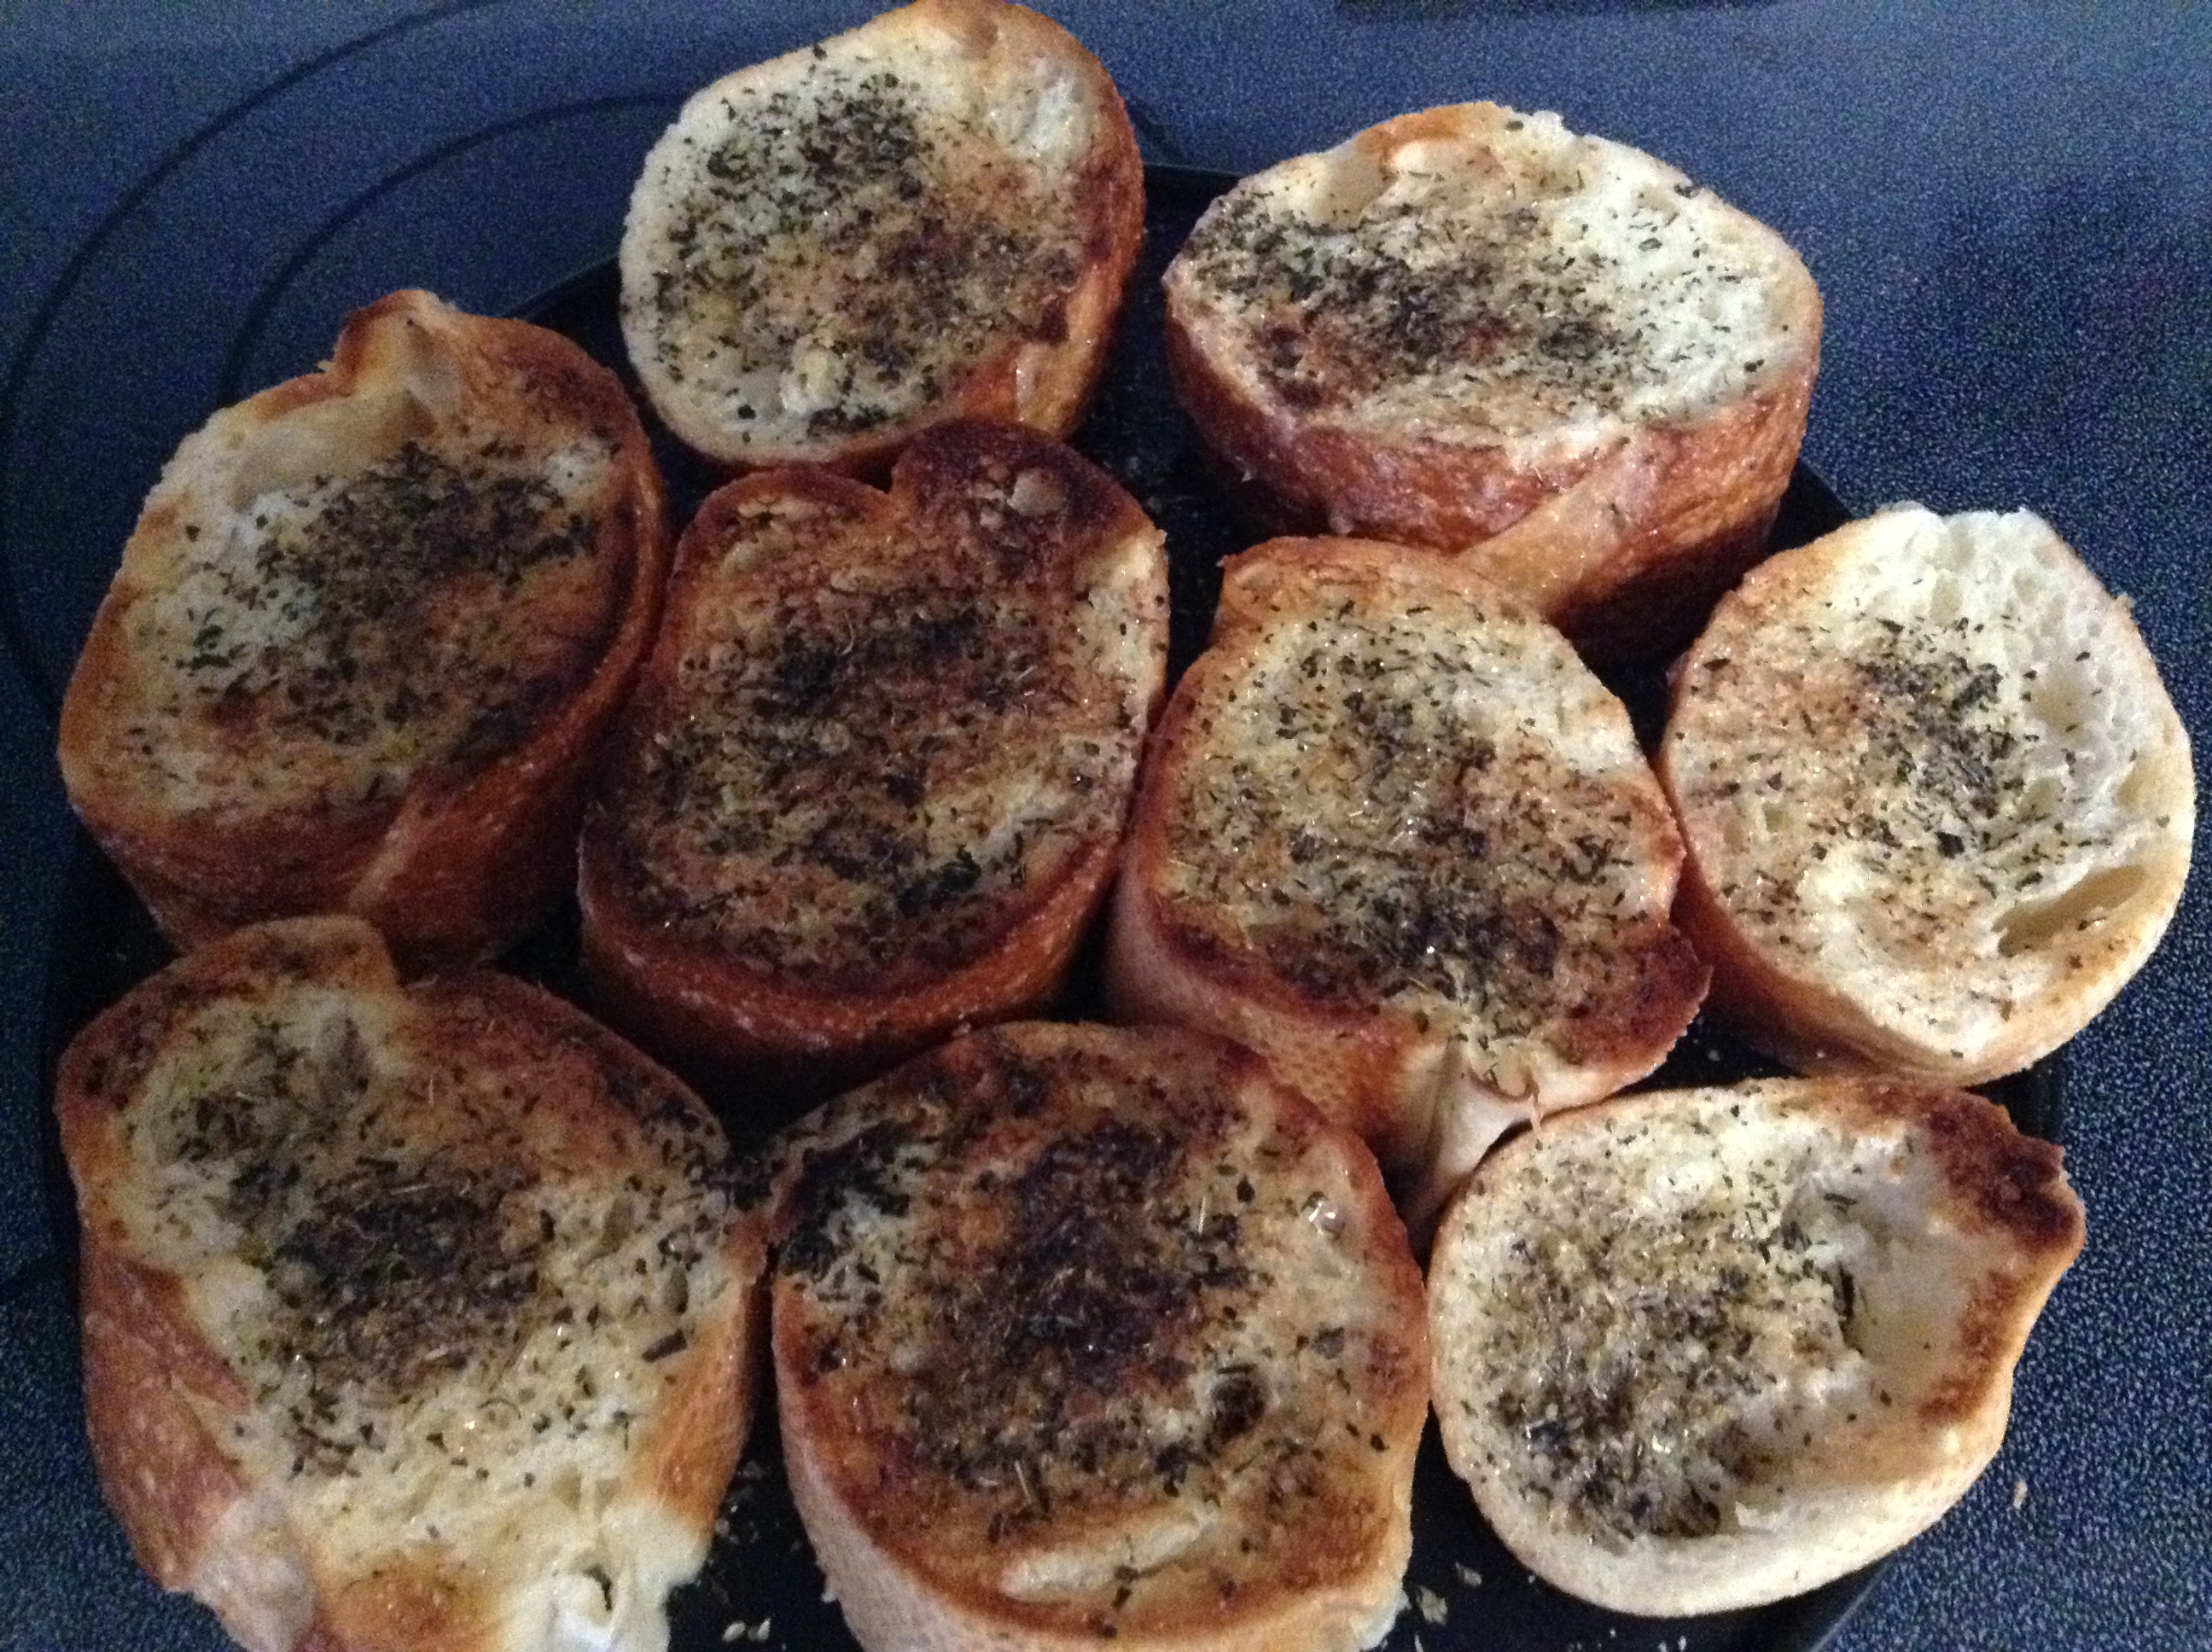
Breakfast “Cupcakes” (adapted from The Cooking Jar) Unlike the cinnamon rolls, these little delights are easy.  They also provide a handy way to serve bacon, eggs, cheese and hash browns like a finger food.

A few tips and changes:

  • Coat your muffin tins with butter, not nonstick spray.  The butter will do the double-duty work of keeping everything from sticking to the tins but also crisping the hash brown “liners.”
  • Really press the hash browns into the tin sides and bottom.  You aren’t going to need a really deep “cup,” because the egg will ooze a little into the spaces between the potato.
  • I don’t particularly care for runny egg yolk, so I scrambled eight eggs together with a little milk, salt and pepper, then poured the mixture into each cup until it was level with the pan.  Baking time was equivalent, and the added benefit was that the eggs rise, making the whole think look just like a cupcake.  This would be a great time to show you a photo … if I’d been smart enough to take one.  Ahem.
  • Remove the “cupcakes” from the pan right away to avoid sticking.  I used a small frosting spatula, which worked well.
  • Serve immediately.  Cold eggs get rubbery, which is gross.  We had two “cupcakes” left over, so I threw them in a zipper-seal bag and refrigerated them.  I reheated them the next day using the toaster oven set at 350 F.  Took about 10 minutes.  Still good.
  • I do NOT recommend using a microwave to reheat.  The hash browns will get soggy and eggs rubbery and it will smell good but taste like a mouthful of horrible, and you will be upset AND hungry (= HANGRY), which just is not how you want to start a morning.  So I’ve heard.

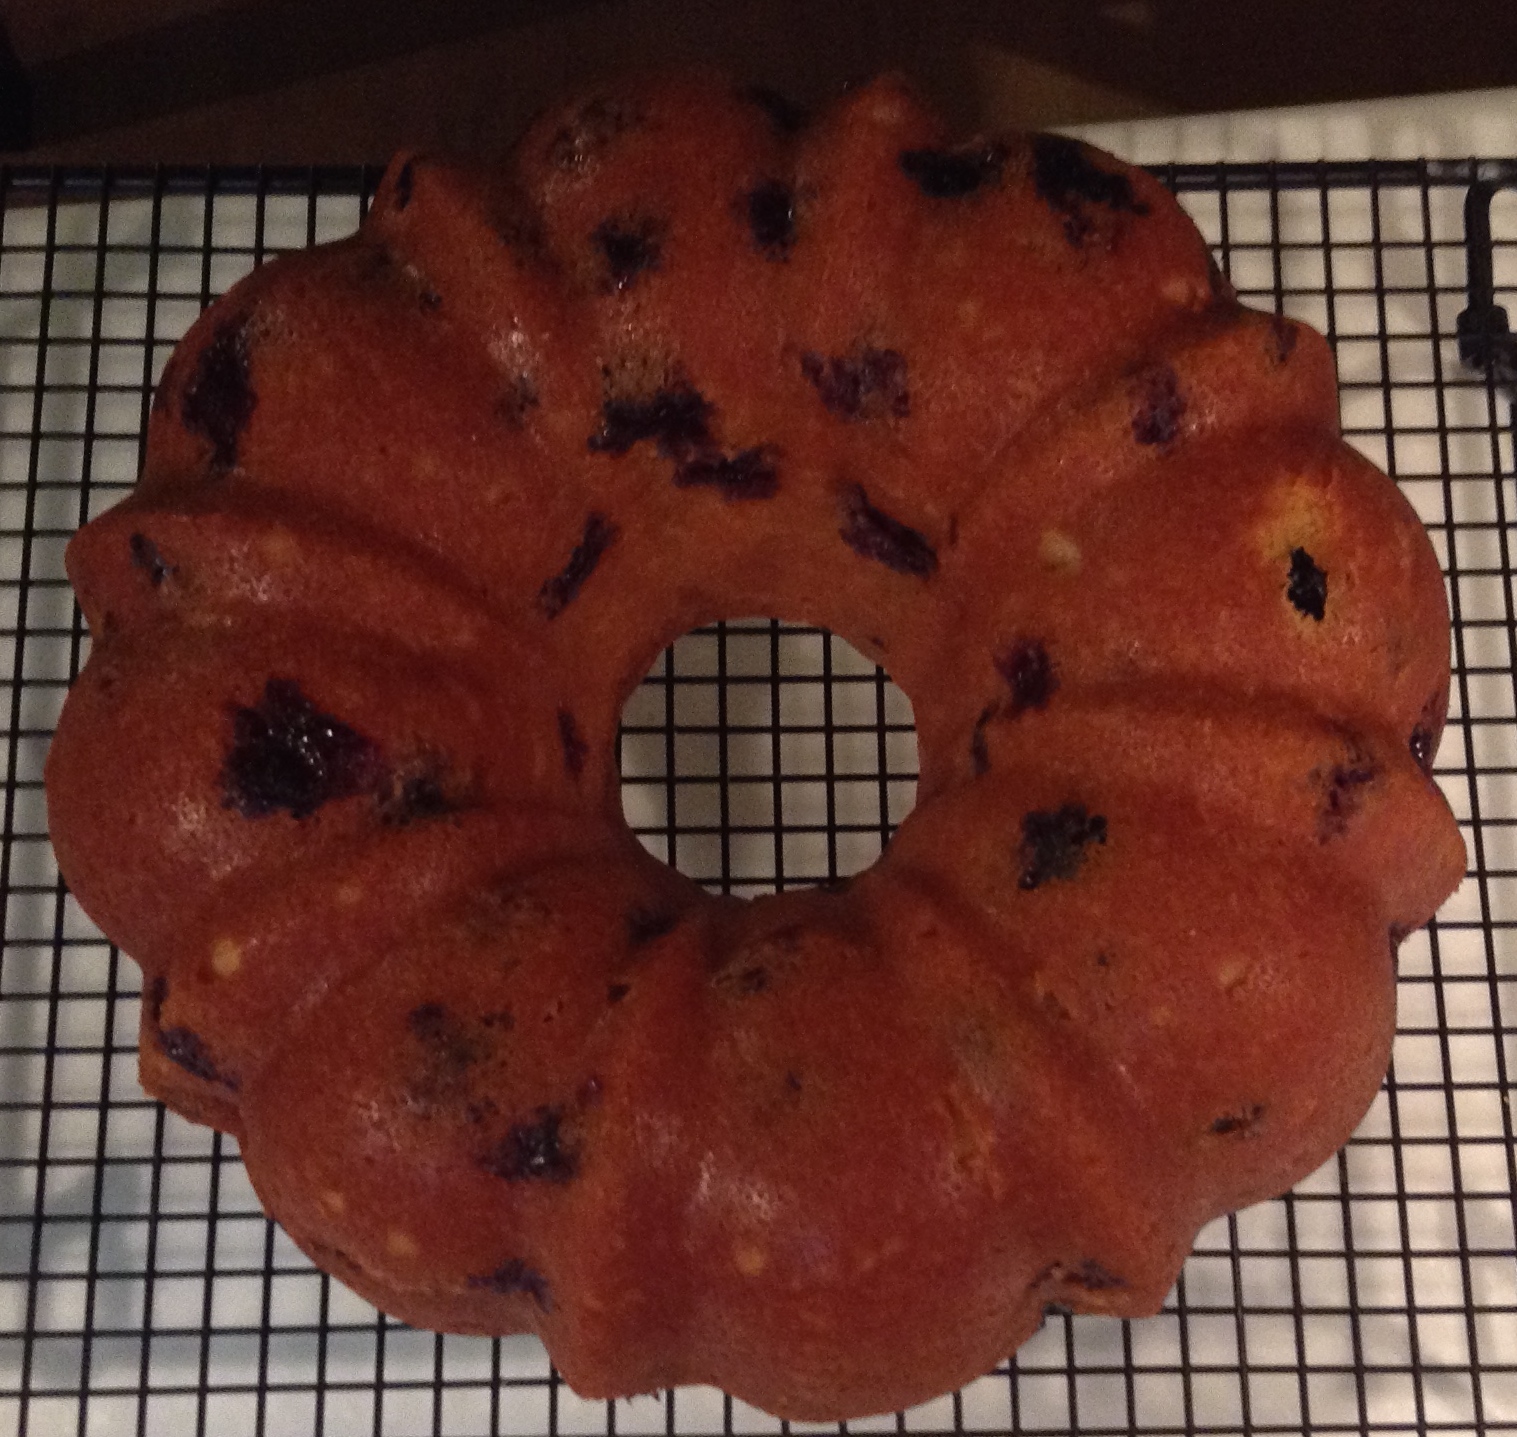
Blueberry Lemon Bundt Cake (adapted from Martha Stewart) Oh, Martha.  Martha, Martha, Martha.  I want to hate you, but then you put out little gems like this.  Blueberry muffins are one of the best inventions ever (says the girl who has an unrivaled carb addiction).  Pound cake is one of the best inventions ever.  (CARB.  ADDICTION.)  This cake is what happens when blueberry muffins and pound cake collide into a spectacular lemony, moist, dense, flavorful break-ssert.

Right from the oven - a beautiful, golden-brown crusty top.

Right from the oven – a beautiful, golden-brown crusty top.

Inverted and waiting for a snowfall of confectioners' sugar

Inverted after cooling and waiting for a snowfall of confectioners’ sugar

The only thing I altered for this recipe was to substitute plain Greek yogurt for the sour cream.  My favorite is Siggi’s, because it is so dense.  (Siggi’s did not compensate me in any way to say this, but – you know – I wouldn’t be offended or anything if they sent me some free stuff.)

Couple of tips:

  • Bundt pans are unforgiving little bastards.  If so much as a crumb gets stuck in the pan when you invert the cake, it’s hard to fix the blemish.  So, I recommend prepping your bundt pan with nonstick spray, which will ensure you get a good coat in every crevice.  Pay special attention to the inner circle of the pan, all the way up to the rim.  This is where many a bundt-cake-dream is crushed.
  • Follow the directions for cooling the cake before inversion carefully.  No one likes a cake decorated with the salt of your tears.
  • If you make this cake ahead, I suggest serving the slices slightly toasted and dressed with a pat of butter.  You’re welcome.

Next series:

Culinary Christmas Series – Review 1 of 4

It’s been a while since I’ve posted anything, but that’s only because I’ve been extra busy in the kitchen!  I had big plans for an epic Thanksgiving post, but that will have to wait until next October.  (One of you needs to remind me before Halloween, thanks.)  In the meantime, though, I wanted to share with you what I made this Christmas to give away as gifts and for noshing on Christmas morning.

I went full-on experimental this season; instead of tried-and-true recipes, everything I made was a first-run effort (with maybe one or two do-overs … no one’s counting). Here’s the lineup:

  • Christmas Spice Cookies
  • Whiskey Caramel Sauce
  • Candied “Limoncello” Peel
  • Cinnamon Rolls with Cream Cheese Icing
  • Breakfast “Cupcakes”
  • Blueberry Lemon Bundt Cake
  • Spiced Pear Vodka
  • Liquored-Up Lollipops
  • Caramel Bourbon Sauce
  • Gin & Tonic Truffles
  • Chocolate “Munchkins”
  • Dark Lemon Cordial

In this post, I review results for Christmas Spice Cookies, Whiskey Caramel Sauce and Candied “Limoncello” Peel.  Review #2 will include Cinnamon Rolls with Cream Cheese Icing, Breakfast “Cupcakes” and Blueberry Lemon Bundt.  Review #3:  Spiced Pear Vodka, Liquored-up Lollipops and Caramel Bourbon Sauce.  Then, Review #4 will wrap up the series with Gin & Tonic Truffles, Chocolate “Munchkins” and Dark Lemon Cordial.

Christmas Spice Cookies (recipe adapted from Citrus and Candy)

Christmas Spice Cookies

True to the recipe author’s promise, these are chewy little bites of exactly the spicy-sweet I imagine Christmas would taste of if you could eat it.  A couple of lessons learned from this:

  • I was out of vanilla beans (you’ll see why below), so I substituted vanilla powder in both the cookies and the icing.  I chose the powder instead of the extract because it does not alter the color of your dough and I thought it might be a little more intense flavor wise.  I don’t think the substitution left the cookies lacking in flavor.  Vanilla beans are really expensive, so if you want to make this substitution to save cost (especially if you’re making these in large batches), you should be okay.
  • Take the recipe author’s advice about letting the dough sit so the flavors develop. I did not with my first batch, because impatient.  There was a noticeable difference in the intensity of the flavor in the second batch, which did sit.
  • I did not add the all spice to the icing, because that felt like overkill to me with the great flavor of the cookies.  Instead, I doubled the cinnamon to two pinches.  This made the icing a little darker (to the brown side) than it appears in the pictures, but it really complemented the cookies well.
  • I did not make the vanilla sea salt.  Instead, I used gray sea salt, which I love.  This was just personal preference for me. I love vanilla, but vanilla in the cookies, the icing and the salt seemed like overkill.  The beauty of these cookies is the multiplicity of flavors.
  • Icing these is awesomely easy.  Storing them, not as much.  The icing does “harden” after about an hour or so, making storage much easier.  If you have to stack the cookies to store or box them, parchment or wax paper is your friend between layers. If the cookies warm much beyond room temp, the icing will soften and make a mess, so the parchment or wax paper will help minimize it.
  • I recommend you err on the side of undercooking.  There is a span of about 30 seconds between when the cookies will stay chewy when cooled and when they will seem soft but dry.  When the author says “firm to the touch” read that to mean “when the cookie gives any kind of resistance to the touch of your finger.”

Whiskey Caramel Sauce (adapted from Food52 / Becky Rosenthal at Vintage Mixer)

I made two batches of this recipe, which yielded 9 four-ounce servings plus about two ounces.  This is less than the yield stated in the recipe. It might have been because I kept taking out spoonfuls to “test” it.  Possibly.  Maybe.  What?  I had bacon.

I stored the servings in Mason jars, which I decorated with ribbon and labels (same idea you see in the photos on the recipe website, but with a holiday design), and I gave them away as part of gift baskets I made for friends and family.

No modifications except that I used sea salt for the salt called for in the recipe, because I like the stronger flavor and how it cuts the sweetness just enough.

A couple of things to note:

  • If you pour this into the Mason jars while the caramel is still hot, do not be alarmed if the jar lids “pop” as the caramel cools.
  • This pairs beautifully with cookies, brownies, apple pie, ice cream and coffee.  It also functions as a lovely dip for bacon.  I hear.  From a friend.
  • It needs to be refrigerated if not used within a day (because of the dairy).  When refrigerated, the sauce may separate but you should be able to shake it or stir it back into a whole.  Serving at room temp is fine.  If heating, I like to put the jar into a pot of simmering water for a few minutes.  I’ve burned myself one too many times on sauces reheated in the microwave, so I’m bitter and old-school.

Candied “Limoncello” Peel (adapted from The Kitchn)candied lemon peel

Booze, sugar and holidays go together for me.  Palate preference?  Coping mechanism?  Who’s to say? Po-tay-to, po-tah-to.  But, sticking with my theme, I adapted this recipe for candied lemon peel to make it full of boozy, sugary goodness by making two important modifications.

First, instead of using a vegetable peeler to remove the lemon peel, I cut the whole lemon in half width-wise.  Then, I used a sharp paring knife to separate the fruit from the peel.  I flattened the peel, then used the paring knife to remove most (but not all) of the pith from the rind.  I then cut the peel length-wise into 1/8″ – 1/4″ strips.  It is definitely more work, but I found it worth the effort.  Instead of a papery slice of rind, you get a chewy, gumdrop-like bite that more closely resembles candy than jerky.  Note that leaving some of the pith behind to get this result with the texture means that the peel will retain more bitterness.  If you will eat the finished peels like candy, you may want to boil them down a third time if the bitterness is too much for you.

Second, I substituted 1/4 cup of the cold water with 1/4 cup of cold rum (but any high-proof, clear alcohol would work).  This infused the peels with a mild liquor flavor that, when combined with the sugar coating, gives the finished peels a flavor reminiscent of Limoncello.

A couple of things to note:

  • Be patient.  It will take a long time for the sauce to develop into a syrup.  I let mine go the full 60 minutes recommended in the recipe, but I cook on an electric cooktop.  (NOT BY CHOICE!)  If you are using a gas cooktop, cooking time may go faster.  No matter what, though, keep an eye on the pot when you get about 30 minutes in.  If the sugar starts turning darker to any degree, you are done cooking!
  • Save the syrup after removing the peel.  It is delicious in tea, over pound cake or added to a fresh-fruit salad.  Keep it in the fridge.  It will keep a long time.
  • I did not use wax paper coated with cooking spray as suggested in the recipe. I just felt like I didn’t want any of that cooking spray soaking into the lemon peels and messing with the flavor. Instead, I used a dry piece of parchment.  I did not have problems with sticking.
  • Make sure the peels are still warm when coating with sugar (if doing this step).  You will need more sugar than you think, because some of it will melt into the peels.  You cannot possibly over-sugar the peels (remember:  bitter pith) so don’t be afraid to pour it on.  You can reserve the excess sugar, which will now be infused with a mild lemon flavor, for another use (but use within a few days or discard).
  • I stored the finished peels in clear Mason jars.  7 lemons filled six 6-ounce Mason jars with 15 pieces of lemon peel with a few pieces left over for me!

If you make any of these great treats, I’d love to hear about your experience – especially if you made changes to the recipe you think improves it!

Sunday Dinner: Chicken and Orzo with Garlic Bread

This week’s Sunday Dinner is my ultimate comfort food, is what I would request for my last meal (provided either I can prepare it myself or can reincarnate my grandfather to make it for me), and is the official birthday dinner for my sister.   Welcome to the gastronomic utopia that is:  chicken and orzo.

chicken orzo mise en place

Ingredients

1 whole chicken (this one is a little bit more than 6 pounds)

2 sticks unsalted butter (melted)

Juice of 4 large lemons (reserve 3 lemon halves after juicing)

8 – 10 cloves of garlic

1 medium onion (cut into about 6-8 large chunks)

8 – 10 sprigs fresh thyme

10 – 12  sprigs fresh oregano

12 – 16 basil leaves

2 tbsp fresh or dried parsley

1 lb. orzo pasta

kosher salt

ground black pepper

About 8″ of kitchen twine

dried basil, thyme and oregano (optional)

garlic powder (optional)

Preparation

Preheat oven to 400°F.

First prepare the ingredients that will go into the chicken.  Melt the butter. Gather the oregano, thyme and basil.  Juice your lemons, then drop 3 lemon halves into the lemon juice.  Peel the garlic.  Peel and cut the onion.  Grab your salt and pepper and keep near your work area.

herb mise en place

You will need a roasting pan.  I prefer one that has a grate in it, because it allows heat to circulate under the chicken, and it prevents the chicken from sticking to the bottom of the pan.  But, a roasting pan without a grate it fine.  What’s important is that your pan is large enough to hold the chicken while still allowing a little clearance around the circumference (e.g., the chicken should not touch the sides of the pan).

raw whole chicken

Make sure you clean out the chicken’s neck and stomach cavities.  I discard the heart, liver, kidneys and neck.  Rinse the chicken in cool water (inside and out) then pat dry with paper towels.

Stuff the lemon halves, onion, garlic, oregano, basil and thyme into the chicken’s stomach cavity.  You want to pack these ingredients in so that the entire cavity is filled.  You may want also to loosen the skin a bit and slide some of the garlic and herbs under it.

The point of this is twofold.  First, filling the stomach cavity keeps the chicken from drying out while roasting.  Second, doing this infuses the chicken with great flavor.

filling chicken cavity

Once you’ve stuffed the chicken, you need to truss it.  Sort of.  I do a kind of cheap truss, which is designed only to keep all that stuff you just … um … stuffed … into the chicken inside.  You’ll need some kitchen twine:

kitchen twine

Basically, you fold the flap of skin/fat on the outside of the cavity over the opening, then pull the drumsticks together to keep that in place.  Tie the legs together in a figure-eight and secure with a knot.

tressing

Place the trussed chicken into the roasting pan breast-side up.  Pour the melted butter over the chicken to cover the entire bird.  You can use a pastry brush to spread butter around if needed.

buttering chicken

Now, sprinkle the top of the chicken with salt and pepper.  I also added a little dried oregano, garlic powder and basil to mine.  (NOTE:  Use only garlic powder.  Do NOT use garlic salt.  The only reason garlic salt even exists is for popcorn.)

adding herbs to outside

Tent your roasting pan with foil (or the lid) and place in the oven.  Roasting time is approximately 15 minutes per pound, but I really, really, really encourage you to use a meat thermometer to ensure you don’t under or overcook.  Ideal temperature (measured by inserting the thermometer in the thickest part of the breast and avoiding bone) is 170°F.

meat thermometer

When the chicken is done, remove from oven and allow to rest for at least 10 minutes before carving.

While the chicken is resting, prepare the orzo.  Fill a large pot with water, a four-finger pinch of salt, a splash of olive oil and about one-quarter of the lemon juice.  Place on stove to boil.

prepare orzo

When water comes to boil, add the orzo.  Cook about 9 minutes – only to al dente.  Drain the orzo, then return to pot.  Pour the remaining lemon juice over the orzo and stir to blend.

Strain the drippings from your roasting pan to remove any solids and reserve the liquid.  Pour the strained liquid over the orzo and stir to blend.

finished orzo

I like to serve this with steamed carrots and string beans.  This time, though, I had only carrots and I roasted them for 45 minutes with a little olive oil, salt and pepper.  I also made a tossed green salad of red-leaf lettuce, diced Vidalia onion, sliced cucumbers, dressed with an Italian vinaigrette.

But, the most important addition to this meal – and this cannot be understated – is the garlic bread.  This garlic bread is so good, my husband is a little bit pissed off I am sharing the recipe.  I will warn you, though, that the reason the garlic bread is so delish is that it is basically a ton of butter with a side of bread.  It is not for the weak of heart or wide of waist.  Unless, of course, you want to die with an enormous smile on your face and an immensely satisfied belly.

Garlic Bread Ingredients

garlic bread mise en place

Yes. This is my shitty electric cooktop. I make miracles happen on this thing. I mean, seriously – I have to defy the laws of physics and chemistry to make this thing work.

1 large loaf French bread (white or wheat okay, but not sour) (Seriously, though, wheat bread?  I mean, what’s the point? Unless, you know, it eases your conscience a little …)

2 sticks salted butter

Garlic powder

Dried basil

Dried oregano

Preparation

Melt the butter in a shallow skillet over low heat.  Slice the French bread into 1/2″-thick slices. Dunk one side of each slice in the melted butter.  Place buttered slices on cookie sheet.

dunking bread

Sprinkle the buttered slices with garlic powder, basil and oregano to taste.  (“To taste” in my house means “a lot.”)

garlic bread pre cook

Broil on top rack of oven for about 5 minutes or until tops look golden and toasty.  WATCH WHILE BROILING.  There is about a millisecond between perfectly toasted and frantically waving a kitchen towel around underneath the smoke detector.

finished garlic bread

Before you sit down to eat, take a moment to inhale deeply.  Smell that?  Smells like a giant hug, right?  Isn’t that marvelous?


#SomethingNewEveryDay – Getting to First Base

Yeah, I know what you were thinking.  But, I mean first base literally.

flickr user: calebunseth under Creative Commons license, without modification.  https://flic.kr/p/6E3nCY

flickr user: calebunseth under Creative Commons license, without modification.

A few weeks ago, I saw a post on Facebook asking how many ways a batter can safely reach first base in baseball.  I just today got around to finding out the answer, and I was pretty surprised.

I counted:

A hit, a walk (bases on balls), hit-by-pitch, an intentional walk, catcher drops strike three and fan interference.  But, that was all I could come up with on my own.

Turns out?  The answer is:  23.  Pffft.  Talk about easy …

What are they, you ask?  Read this post from How Stuff Works to find out.

My favorite:  “A game is suspended with a runner on first (maybe for rain) and that player is traded to another team before the makeup; another player can take his place.”

#SomethingNewEveryDay – Literally

Yes, literally, literally.  I, in fact, write every day about something I learned just that day.

Today, though, I learned that literally now means “figuratively.”  Apparently, if enough people misuse a word for enough time it literally changes the meaning of the word.  Literally.

literally

Are you confused now about when I might punch you in the throat?  Will I punch youi n the throat at all?  It’s okay.  I’m confused, too.  Literally.  You know – the way The Oatmeal defines it.

#SomethingNewEveryDay – That Ringing in Your Ears

Last night, when the house was finally quiet, I sat down to catch up on some reading.  Almost instantly, I heard a high-pitched ringing in my ears.  This is definitely not the first time I experienced this, and I’ve always assumed that it’s some sort of reverberations that happen after your move from a very noisy environment to a very quiet one.

Close, but not quite.  (Or quiet, which is what I originally typed and thought about leaving there …)

The ringing has a name:  tinnitus.  It occurs when your ear’s outer hair cells, which vibrate to help you hear quieter sounds, go haywire and spontaneously oscillate.  The oscillation then becomes audible until the nerves responsible for making it stop get the message – usually in about 30 seconds.

Anatomy of the Human Ear.svg
Anatomy of the Human Ear” by Chittka L, Brockmann A – Perception Space—The Final Frontier, A PLoS Biology Vol. 3, No. 4, e137 doi:10.1371/journal.pbio.0030137 (Fig. 1A/Large version), vectorised by Inductiveload. Licensed under CC BY 2.5 via Wikimedia Commons.

For more about tinnitus (and when it’s not “normal”), click here.


#SomethingNewEveryDay – Toe-ma-toe, Toe-mah-toe

You’ve probably heard that a tomato, although widely consider a vegetable, is actually a fruit in the scientific sense of the word “fruit.”

Creative Commons Image: Flickr- Transguyjay

Creative Commons Image: Flickr- Transguyjay

Well, I learned today – possibly to my chagrin – that the United States Supreme Court actually weighed in on this issue in 1893. (I’m hoping it was an otherwise slow year.)  In a case titled Nix v. Hedden, the Supreme Court declared that a tomato is, in fact, a vegetable.  At least when it comes to tariffs.  Why?  No tariffs on fruits, kids.  Taxes, death … and laundry.

#SomethingNewEveryDay – A Butt Load

I’ve definitely said it.  You’ve probably said it.  When referring to a large amount of stuff, you’ve called it a “butt load.”

I had always assumed the expression was hyperbole and a slightly more polite way to say you’ve got a lot of shit.  Well, I was wrong.  A “butt” is an actual unit of measurement equivalent to two hogsheads or 126 gallons.  That’s still a lot of shit.  Just, hopefully, not literal shit.

When clicking the measurement link, see also, “megadeath.”  It’s not just a metal band.


#SomethingNewEveryDay – Smell and Memory

One of my favorite “ice breaker” type questions is this:  Had you to give up one of your five senses – sight, hearing, taste, touch, smell – which one would you choose?

I know from my own experiences that there is a strong association between smell and memory.  Whenever I smell a humid basement – that strange mix of wet concrete specific to New England – I can immediately remember a hundred things about my grandparents’ house.  Years ago, I walked past a man wearing the same cologne a long-ago, long-time boyfriend wore, and I found myself a little choked up before I pieced together what I remembered and why.

But, I never studied why smells can trigger memories.  So, I went in search of an article that might explain, and I found a great one on HowStuffWorks.  It’s worth a read.  The most interesting fact I learned was about anosmia.  Anosmics are people without a sense of smell.  I had no idea that there was an actual name for this condition.  I also did not really appreciate how global sense of smell is in terms of how the human brain works (or doesn’t work).

#SomethingNewEveryDay – Desert Rain Frogs

I love frogs.  It was a surprise even to me.  The year I was waiting for my bar exam results, two of my best girlfriends took me to a little town in California called Murphys.  It’s a wonderful place to eat, shop and wine taste.  But, Murphys is also known for its frogs (or, more specifically, its frog-jumping contest).  In one of the many shops we visited to kill the s  l  o  w  e  s  t  day ever, I found a ceramic frog with huge eyes that I immediately found comforting – the way a child might find comfort in a teddy bear.

But up until yesterday, my experience with frogs was limited to the kind that croak that throaty ribbit people who live near golf courses know and hate. (Yeah, I’m talking to you, G.)  Then, I saw and heard this:

He’s like a real-life squeak toy. And, the juxtaposition of that adorable squeak with his puffy posturing is so stinkin’ cute. I mean terrifying. (Sorry, dude. I mean cute. It can’t be helped.)

You can learn more about desert rain frogs at The Eco-LOL-ogist (which is a great blog if you like science-y type stuff or need a not-so-boring-you-want-stick-a-pencil-in-your-eye resource for a research paper).